The Old Schoolhouse Theater
This page is dedicated to my home theater, a hobby I
picked up a few years ago when I lived in a different house.
Most of this has been copied and pasted from www.avsforum.com
which is a forum where people can document the chronology of their
theater builds. I'll try and edit this article so it
makes sense but the formatting is different than the forum. This
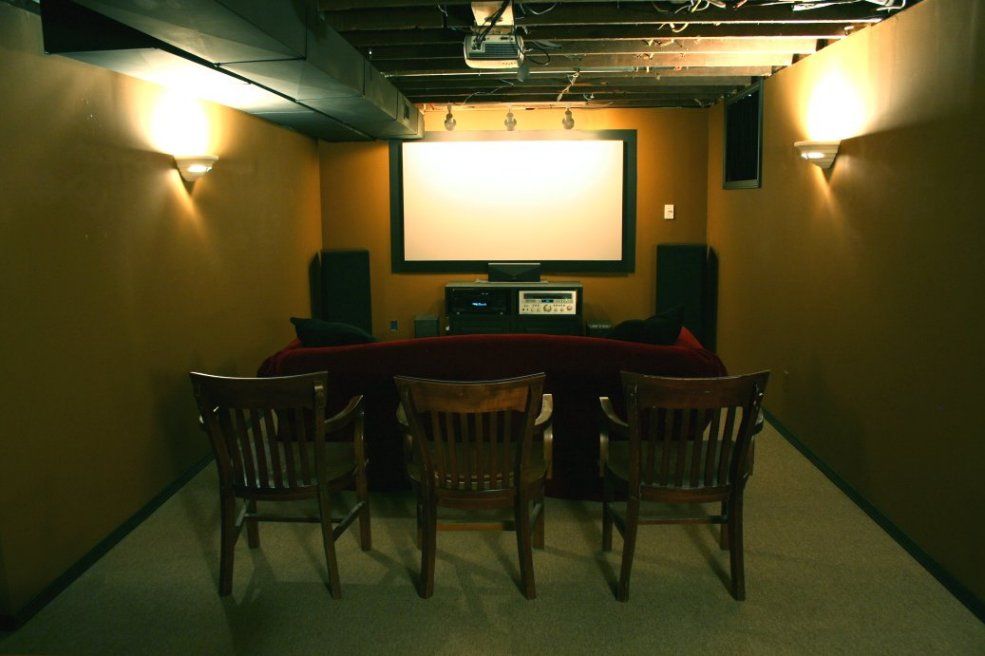
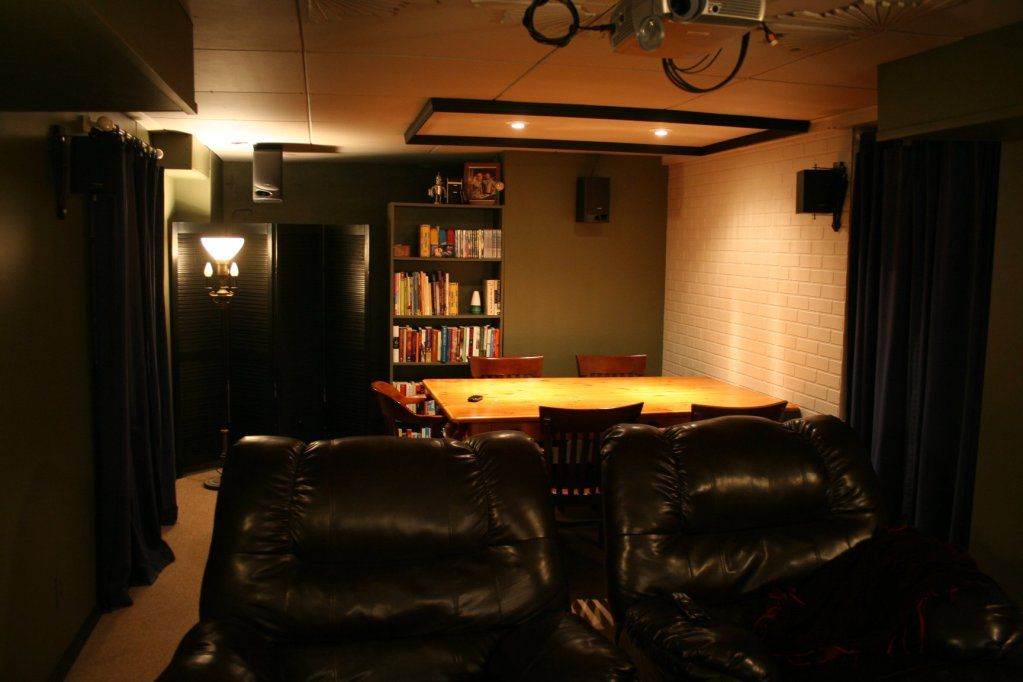
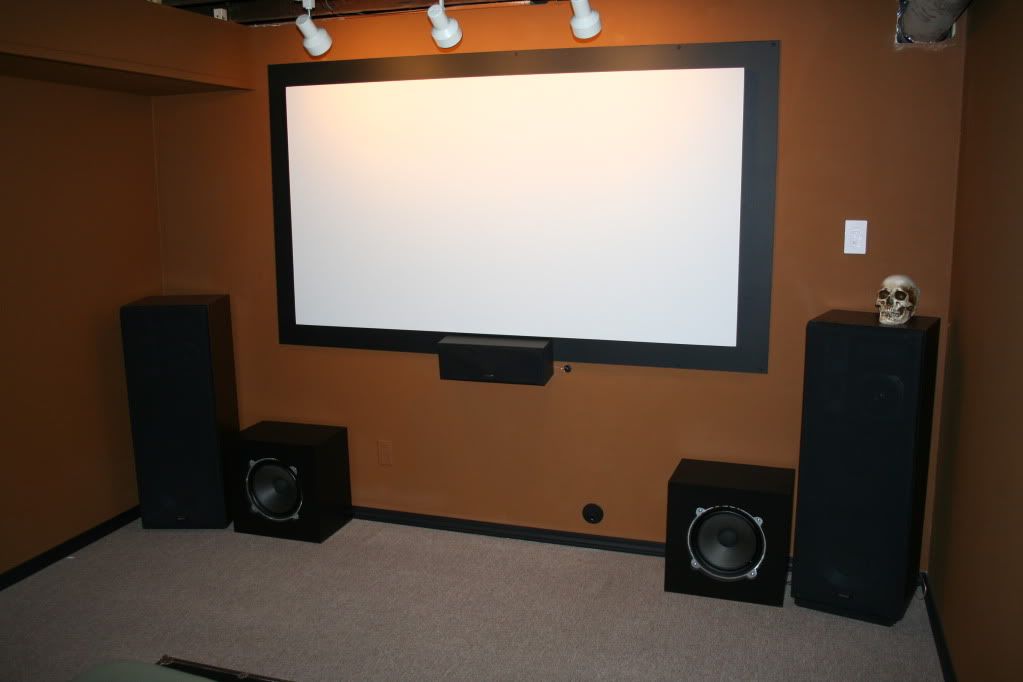
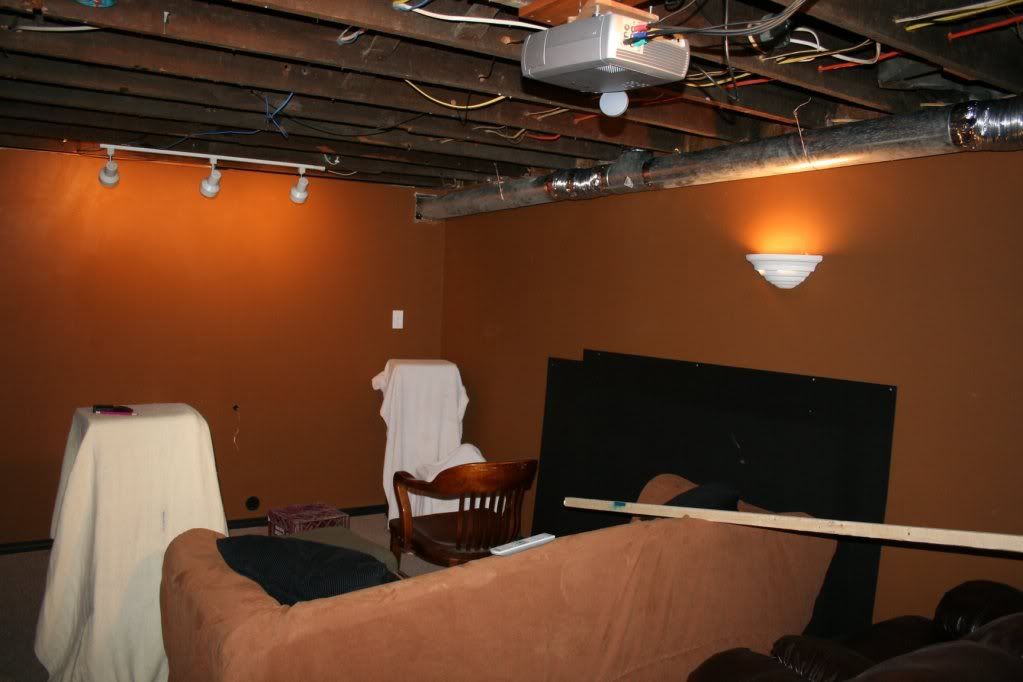
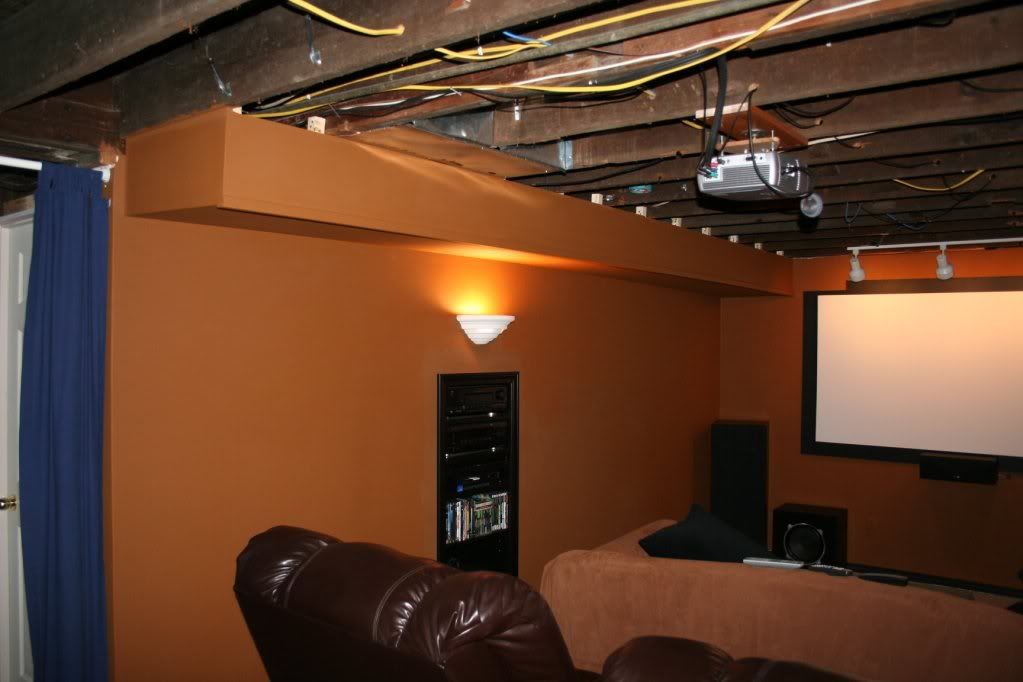
is a picture of the theater when the first build was completed enough
to make it usable. It has gone through many revisions and
upgrades since then. The progress you will see here has been
spread out over almost four years.

I should mention here that the thing I am most proud of is that this
theater is made completely from recycled, garage-saled, or repaired
items and equipment.
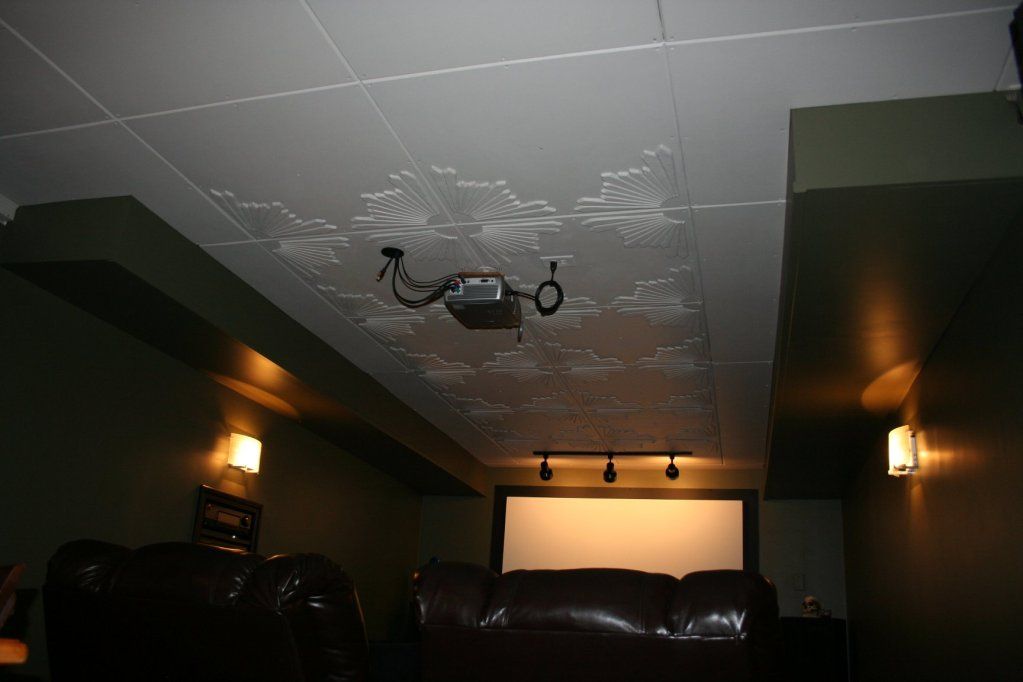
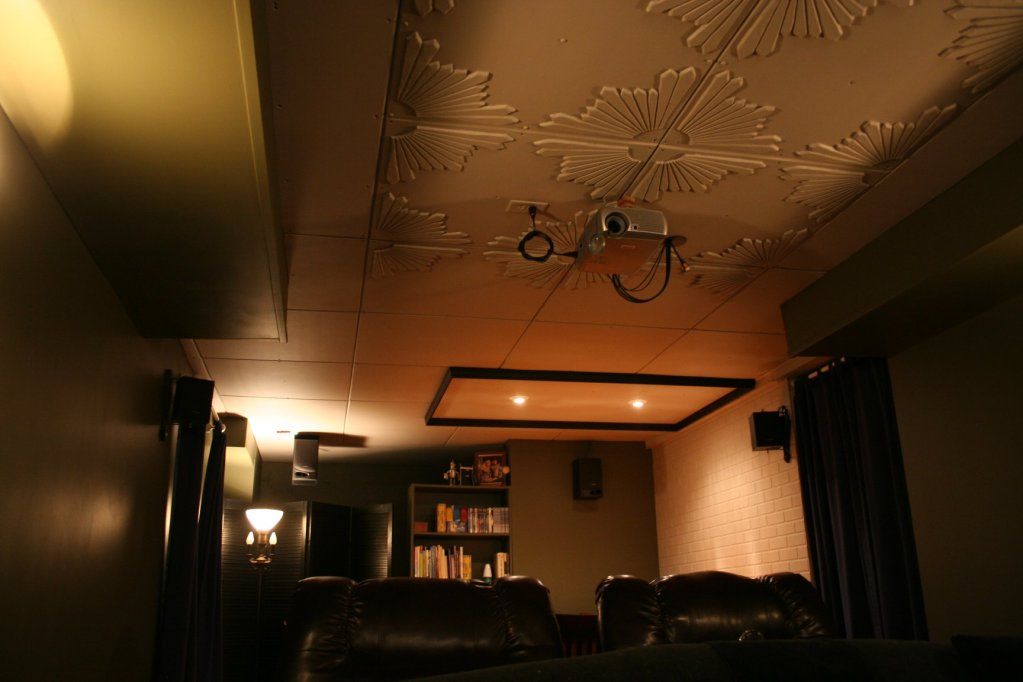
1. The screen is 84" diag. and was built just as I would build a
stretcher for a painting. My first screen was canvas with an
experimental paint job including pearlescent components. I eventually
settled on plain ol' black-out cloth.
2. My projector is an Infocus Screenplay 4805 which I bought on ebay
with the collapsing light tube. This was easily fixed and the bulb
only had 300 hours on it. I would like to mention here that I think it
best to let this particular projector fan-cool after use. I read a FAQ
a couple years ago that claimed that it would increase your bulbs
longevity if you just powered down without fan-cooling, it was more
natural. It is my belief that this hot-soak is why so many light tubes
fail.
3. My surround amp is a JVC Pro Logic II which I got at a yard sale
for $10! I told the gal that it was worth much more and she told me it
belonged to her X-husband and to get it out of her sight. Ummm....okay
 I brought it home and there wasn't a darn thing wrong with it.
4. The large speakers are Kenwood stereo speakers I also got at a yard
sale for $2. The cones needed a little tender loving care but sound
great now.
5. The center and surround speakers are also Kenwood that I got from a
pawn shop. I fixed a few DVD players for him and he gave them to me.
6. The Sony subs were acquired in the same manner. One is powered and
the other is driven by the large amp on the right of the cabinet.
7. Sony DVD player (bought new actually).
8. The cabinet was cobbled together from an old laundry room,
hanging-type cabinet and hand built components. I may eventually
replace this with an equipment closet and build one of those cool
stages everyone seems to like.
9. The surround speaker mounts were hand made. I will include photos
later.
10. PS2 purchased at yet another yard sale for $10. I'm not a gamer
(although I'd like to be) so I don't know if this was a good deal.
11. The chairs are from Barnes & Noble and are really quite
comfortable but will soon be replaced with a couple of faux leather
rocker recliners. I want to build a small riser for them as well.


I will post more detail pics with my next post.
All comments and suggestions welcome.
Thanks for looking,
-Mac
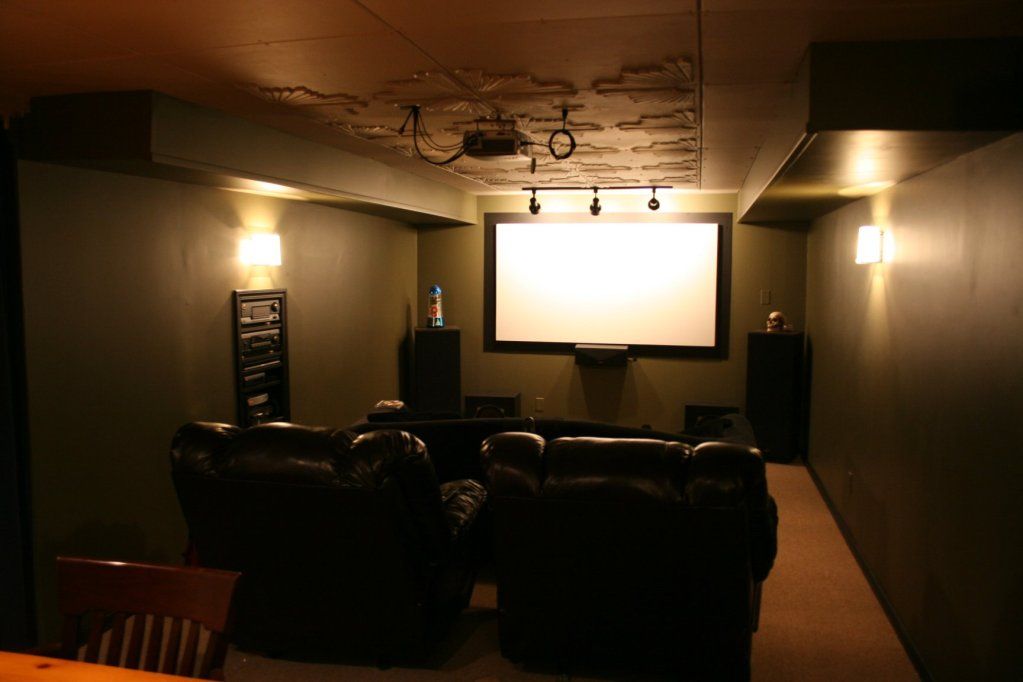
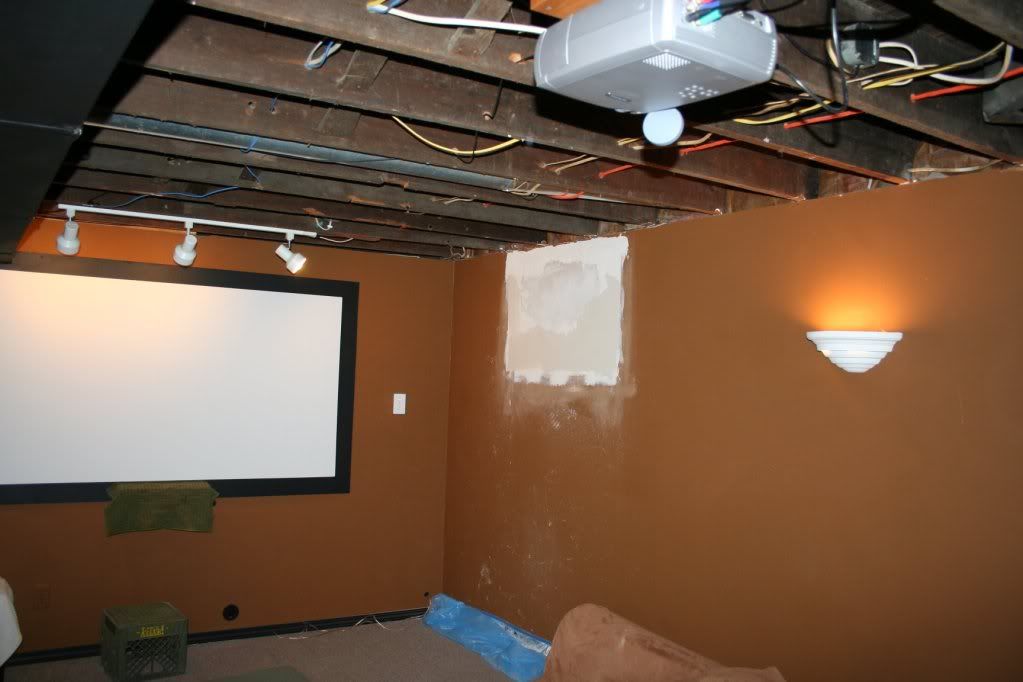
Screenshot. Looks like I need to paint those track lights flat black.

Hello everyone,
It's been a while but I have some updates to the theater I would like
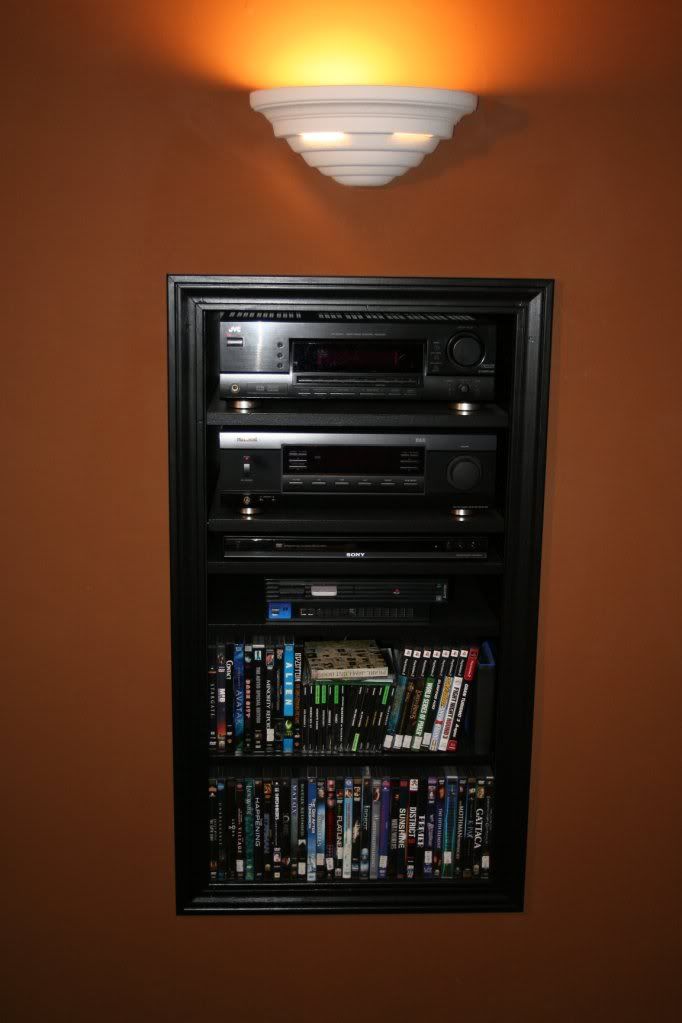
to share. First update was replacing the old cabinet with a DIY
equipment rack. It opens in the back which is located in the utility
room.
Here's a neat little trick. I used MDF for the cabinet but also for
the shelves. You know how hard it is to paint MDF end grain? I sealed
the end grain with wood glue, just smeared on a good layer and wiped
off the excess with a rag, let it dry, and sanded. That way I didn't
get that fuzzy edge I've seen so many times. Works like a charm.
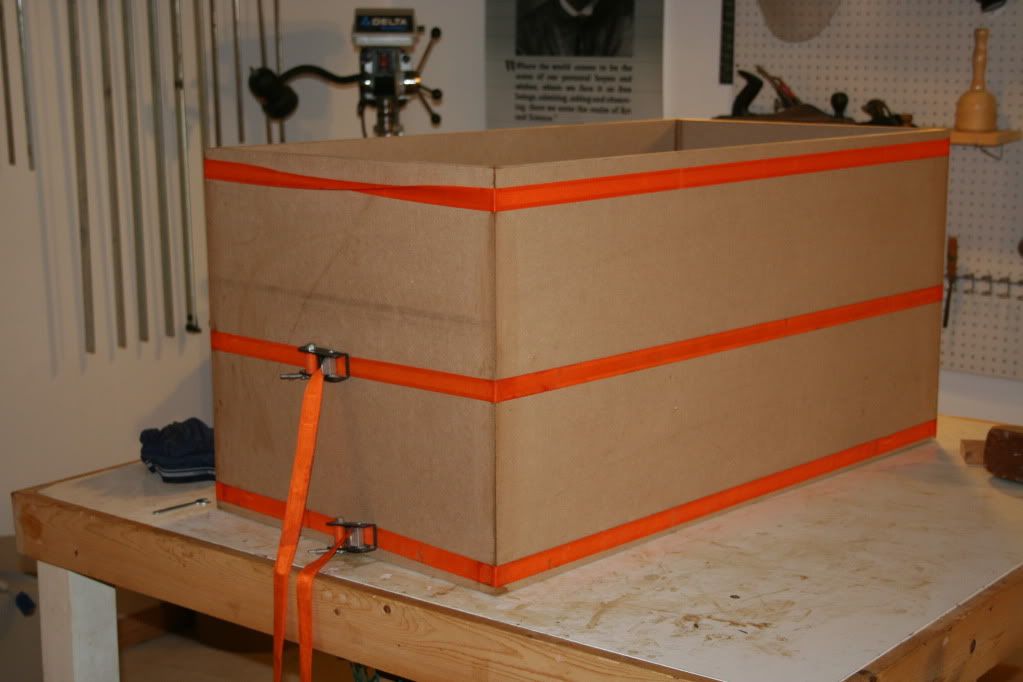
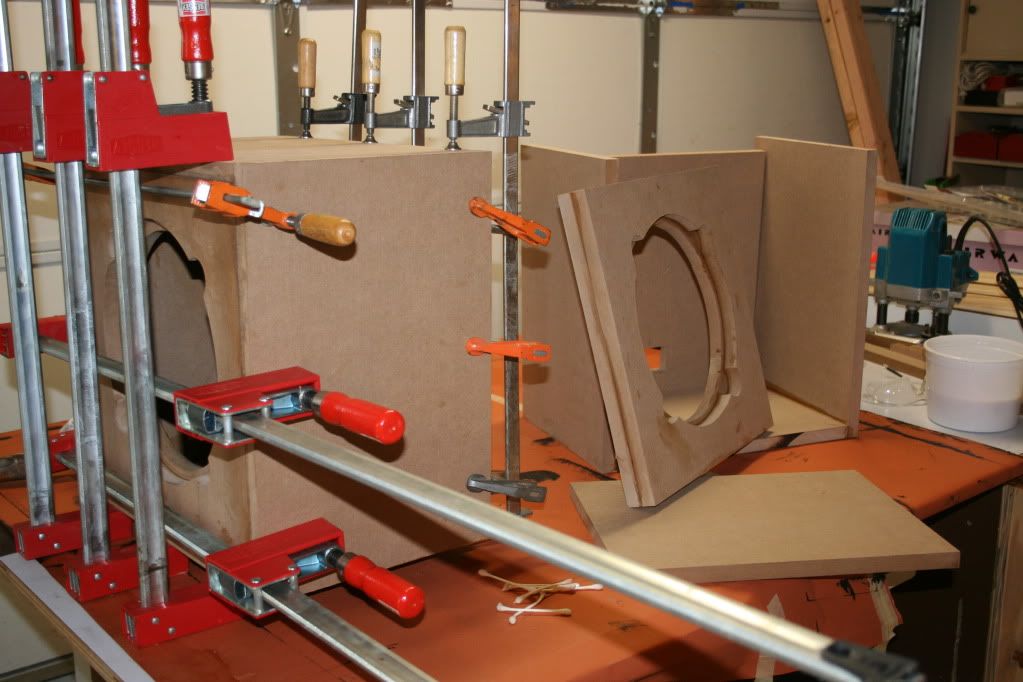
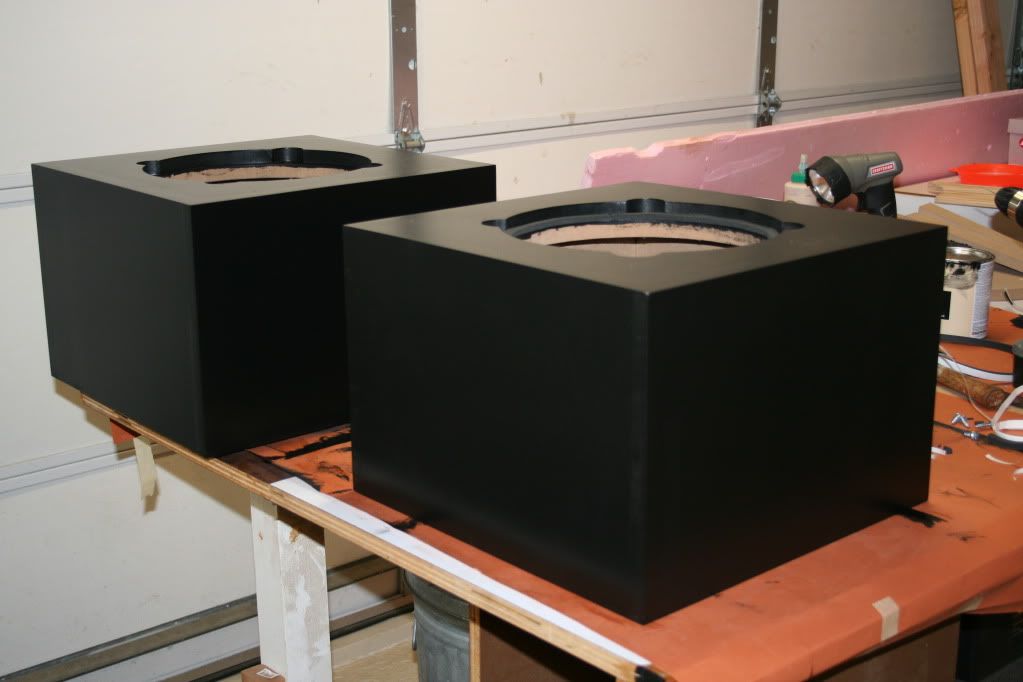
With the new equipment rack up and running I decided to build a couple
subs. My father had given me a couple of stereo spekers before he
passed on but they were a bit 70s looking so I pulled the 10"
woofers and built these. Man oh man, they can sure rattle the teeth.
They're powered by a 120 watt per channel amplifier I had lying
around.
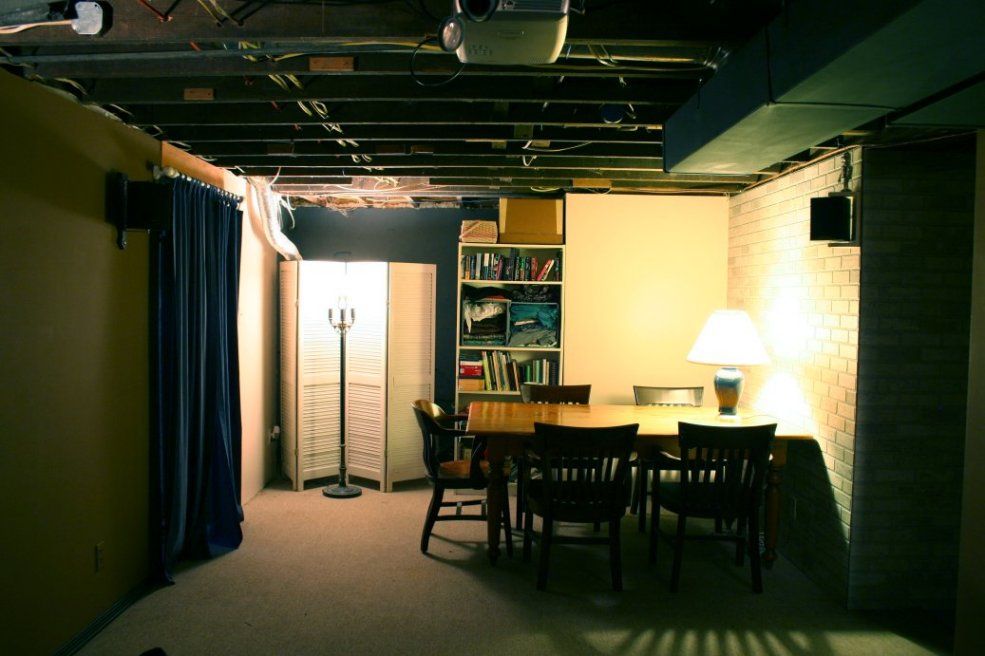
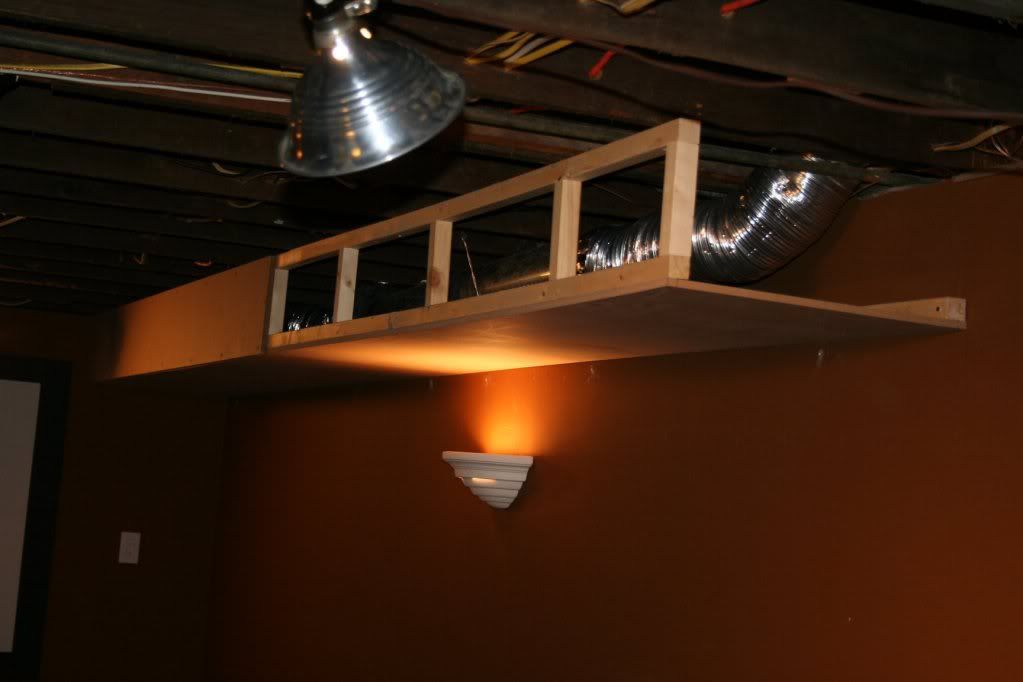
Next I needed to move the rectangular supply duct to the other side of
room so I needed to loose the window.
With the window drywalled over I was able to reroute the ductwork. I
was leary of the effects on airflow but it didn't change it at all.
The space seems so much larger without both rectangular ducts hanging
on the left.
Finally came the time to build the long awaited soffits. I was a
little short on wood so I decided to to simply hang supports directly
from the rafters. Big mistake! Lol, the rafters aren't very even and
it took forever to even out the supports.
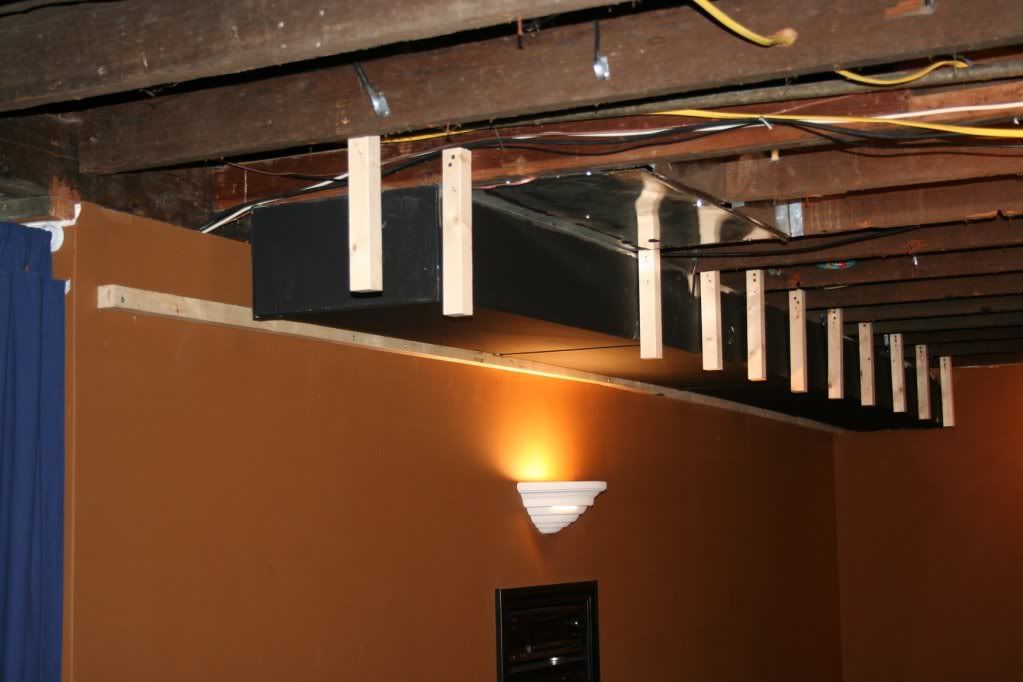
I used 1/2" MDF so I needed a way to hold the panels in place
while I screwed them in. Notice the cleats I screwed to the wall under
the 2x2 to create a kind of cradle to hold the panel.
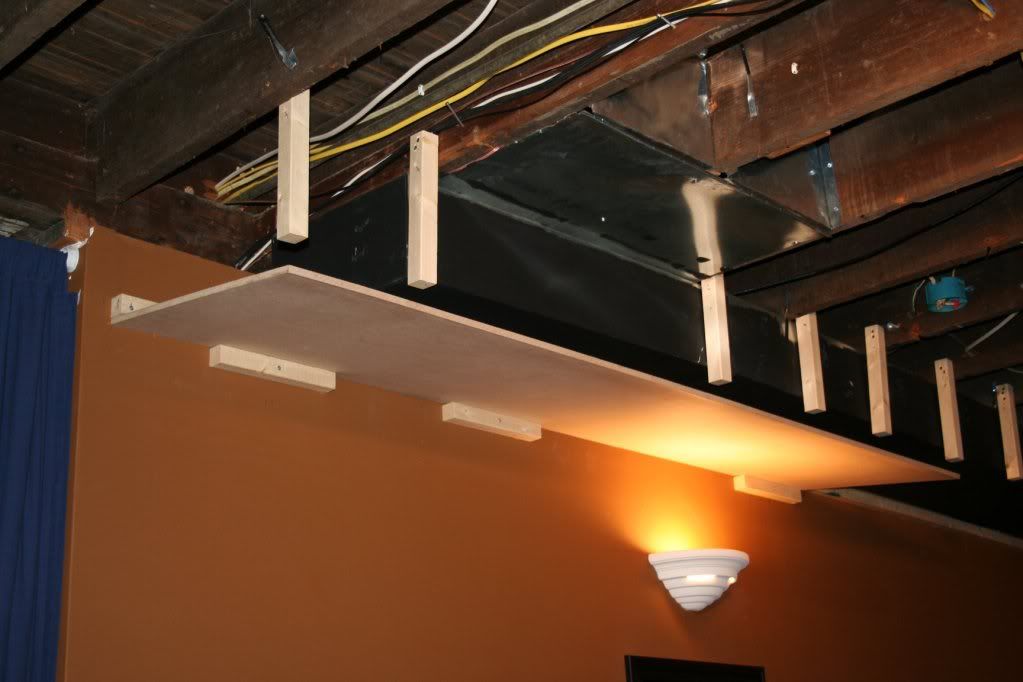
One soffit down, one to go.
Well that's it for now. This weekend I may tackle the other soffit.
This time I'll build a full frame and srew to the lowest rafters.
An interesting note; One of the division secretaries at school found
our house (at the time, a one room schoolhouse) on a map dated 1847!
No wonder the rafters aren't even, lol. They're not even pine. It
seems that oak was common in this area at that time....but I would
swear it drills and smells more like mahogany.
Next on the list:
1. A ceiling
2. A couple of short risers (my ceilings aren't very high)
3. New carpeting
4. Better lighting
Happy building, everyone.
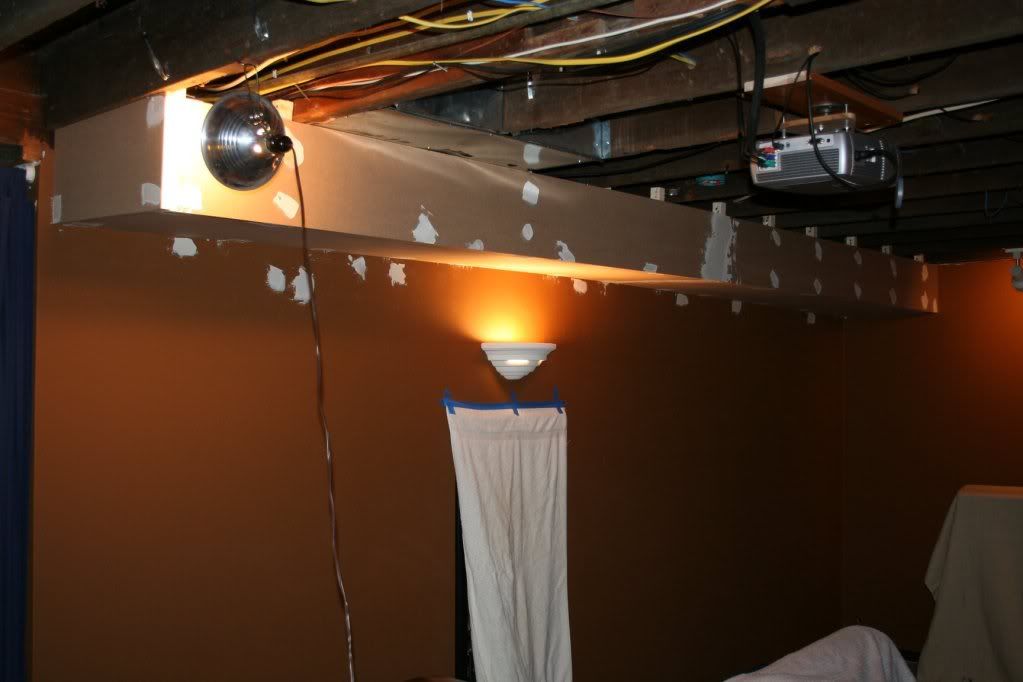
For the right-hand soffit I decided to work smarter
rather than harder. The solid frame made all the difference, although
at 16 ft. long it was still a little too flexible.
The soffits are finished! I actually have a few small ones to build in
the back of the theater but they can wait.
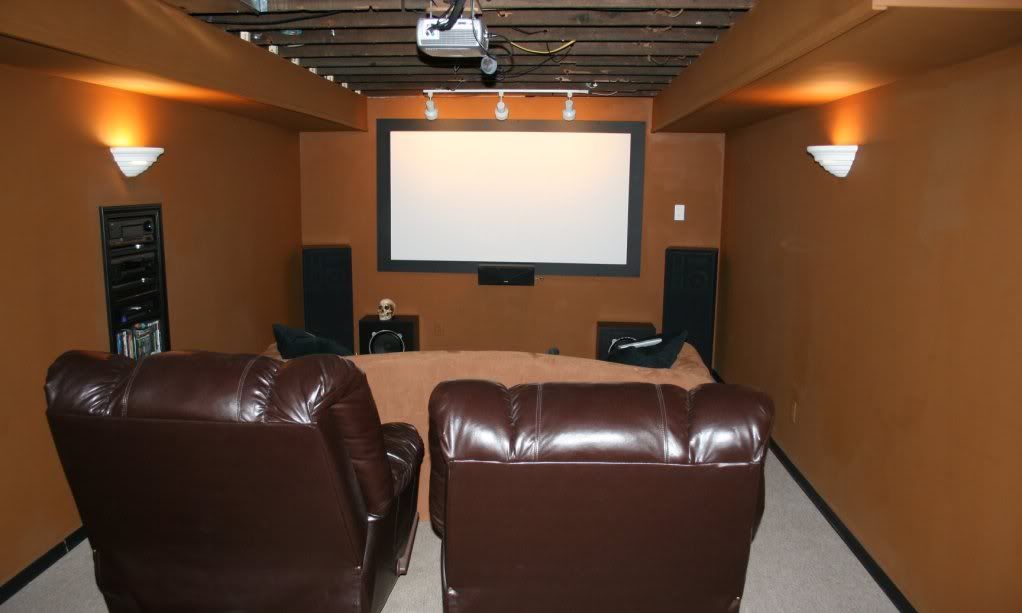
Look at that paint. I haven't been happy with that flat stuff. Too
difficult to touch up, you can tell the difference between brushwork
and roller, and even slightly bumping it, with say your shoulder,
changes the sheen. It's just awful.
Anyway, time to start thinking about the ceiling
Finally, I can give something back to the forum and
people that have given me so much inspiration and so many solutions.
So, my problem ceiling. It's short, like 7.5 feet. So dropping a
ceiling wasn't an option. I have junction boxes everywhere, something
like eleven in just the theater area alone. The pleasures of having a
177 year old house ") Code says that junction boxes must have access so drywall wasn't an
option. Plus, I have committment issues and want to have access to my
wiring and plumbing
Also, I wanted something light enough that I could hang by myself.
Code says that junction boxes must have access so drywall wasn't an
option. Plus, I have committment issues and want to have access to my
wiring and plumbing
Also, I wanted something light enough that I could hang by myself.
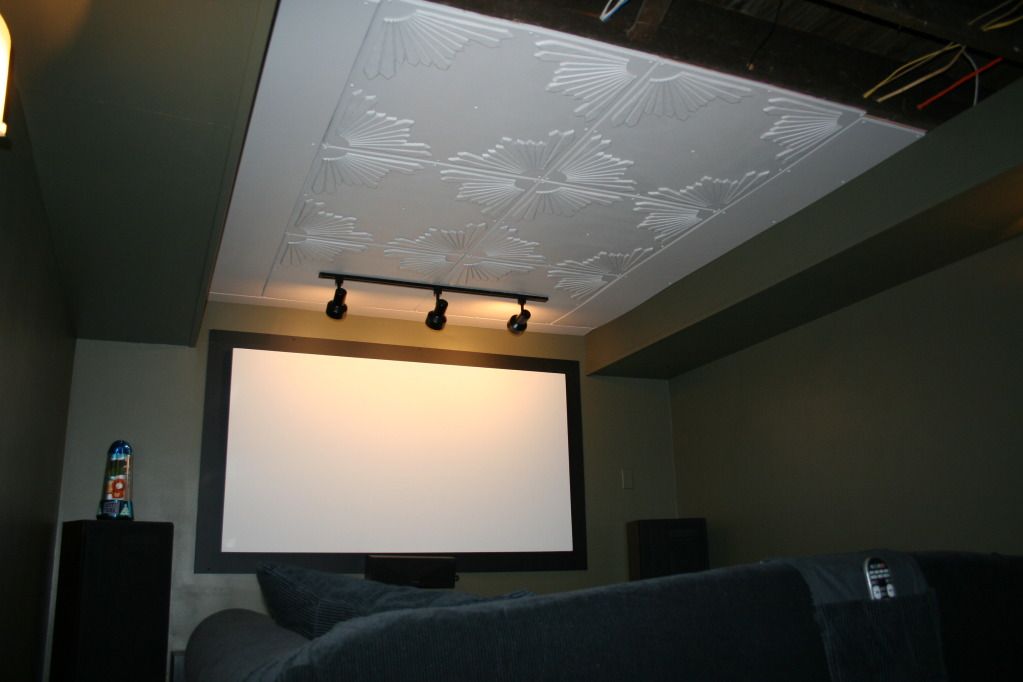
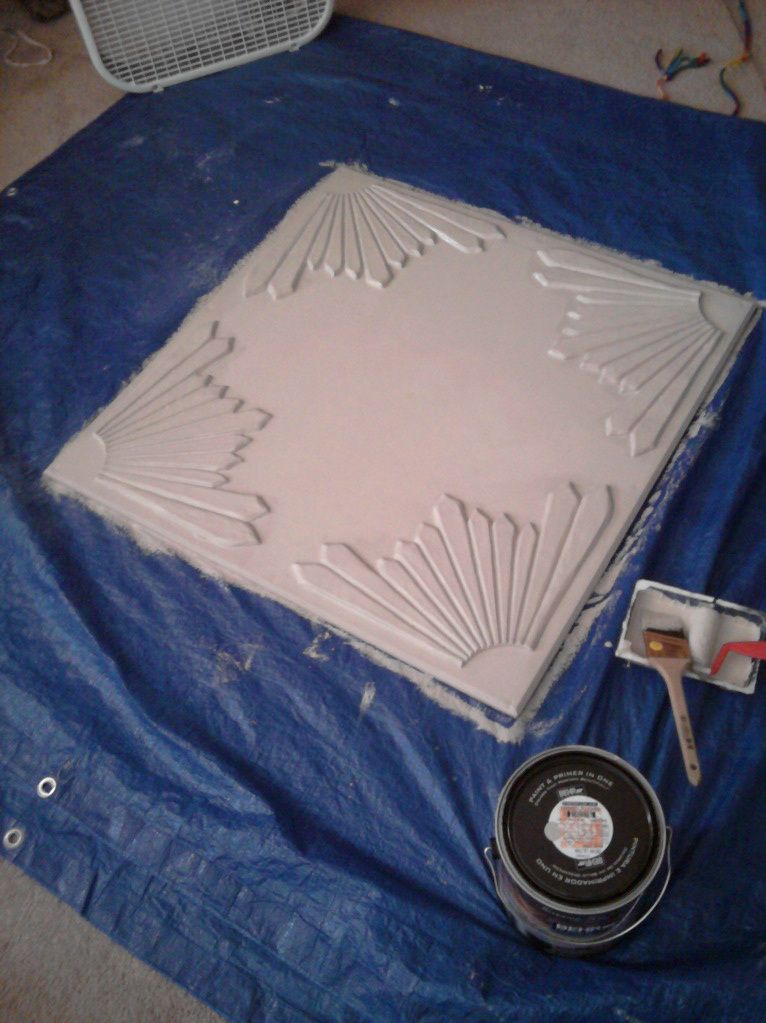
I did some research and found that extruded polystrene, in other words
that pink foam insulation board, is code as long as your house is not
a rental. So I started cutting up my own tiles, beveling them on the
sides for aesthetics. They take roll-on paint well, are light, and
better acoustically than drywall or wood. Better, but not great.
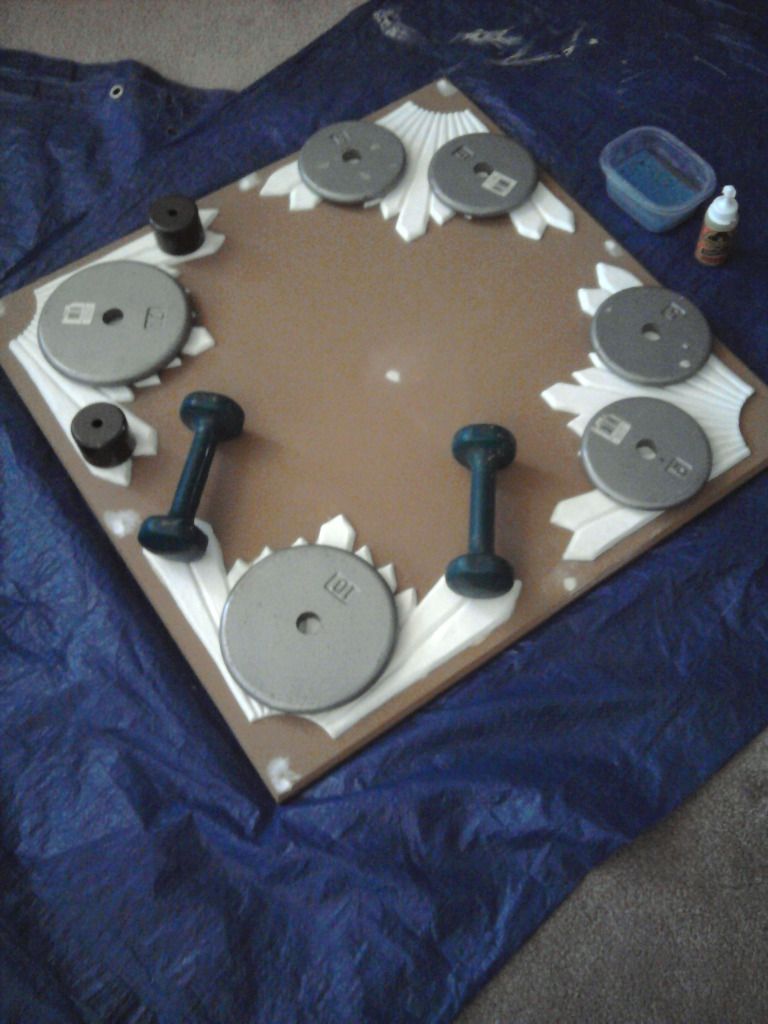
I screwed the tiles directly to the floor joists using drywall screws,
sinking them into the foam about a quarter of an inch. Then I simply
covered the screw holes with 3/8" wood buttons. I painted the
buttons before pressing them into the holes.
The tiles looked pretty good but it was a little too utilitarian for
my tastes so I thought I'd spruce them up with those little wood
accents. But I couldn't find anything I liked, especially sice I
wanted a muted art deco look. So here's what I did:
***
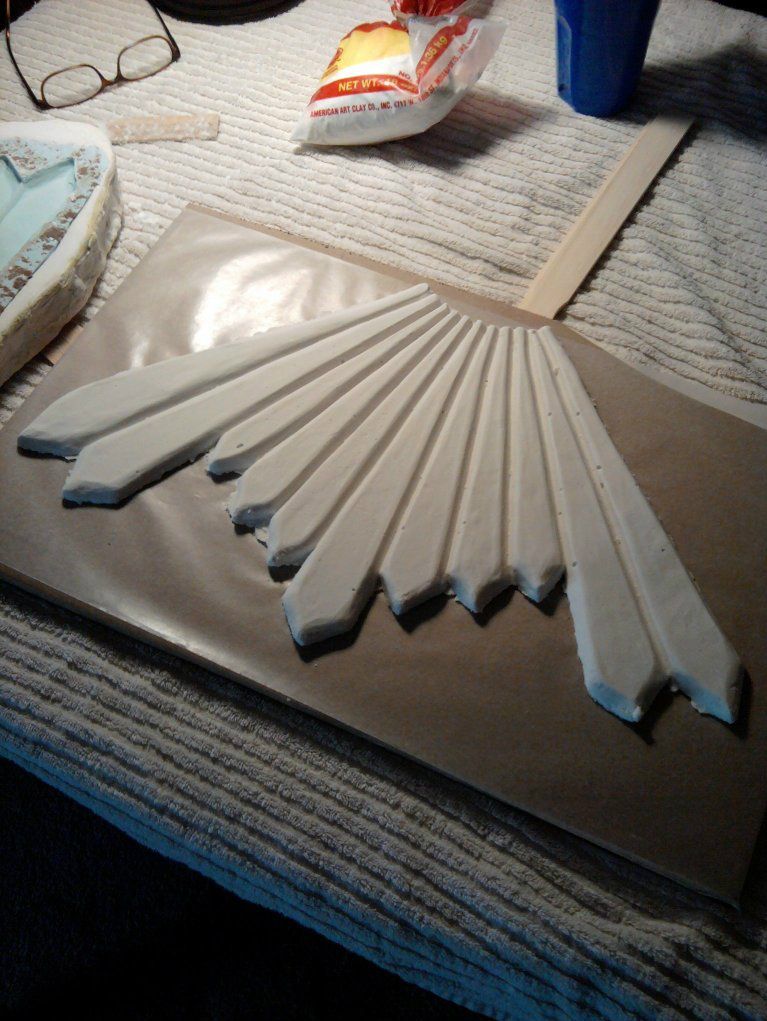
Since I'm a sculptor, I had some oil clay sitting around. This is clay
that doesn't harden so that it can be reused after the mold is made. I
drew up my design and transfered it to the clay slab (rolled with
rolling pin).
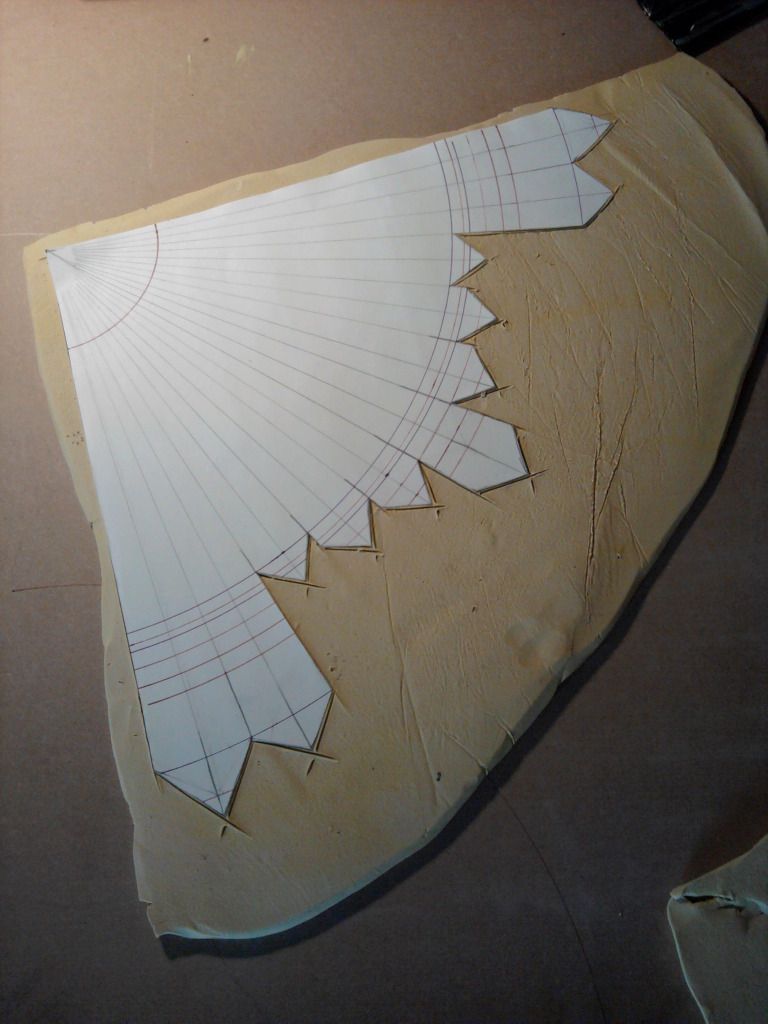
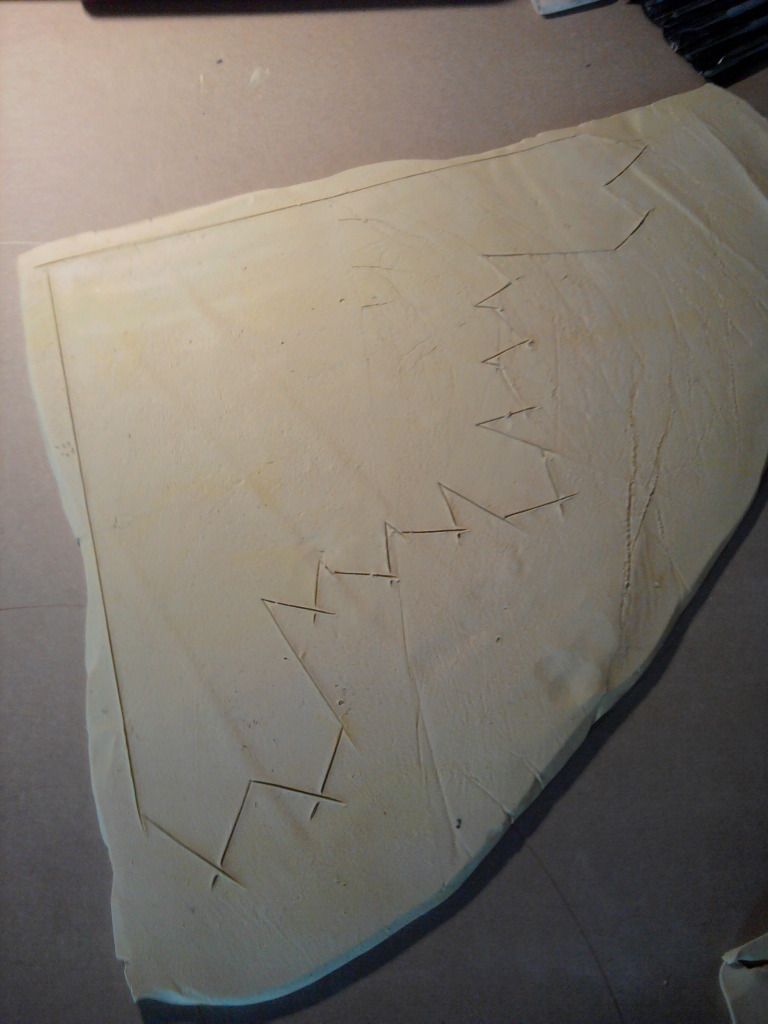
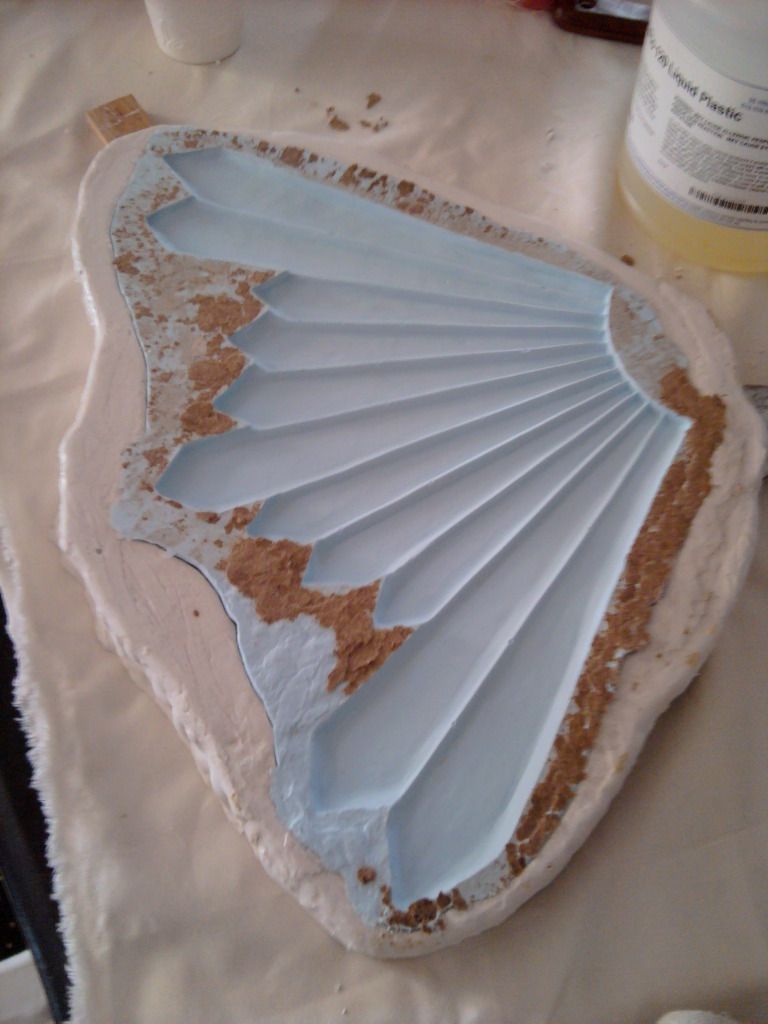
I cut out the form with a kitchen knife and began forming the fins
into what I wanted.

Once the form was sculpted, I used art silicone from a supplier I use
(let me know if you would like the website) to cover the clay. I
didn't have enough silicone to just pour it over the form so I used
thickener. Note the clay wall surrounding the form. This will contain
the plaster.
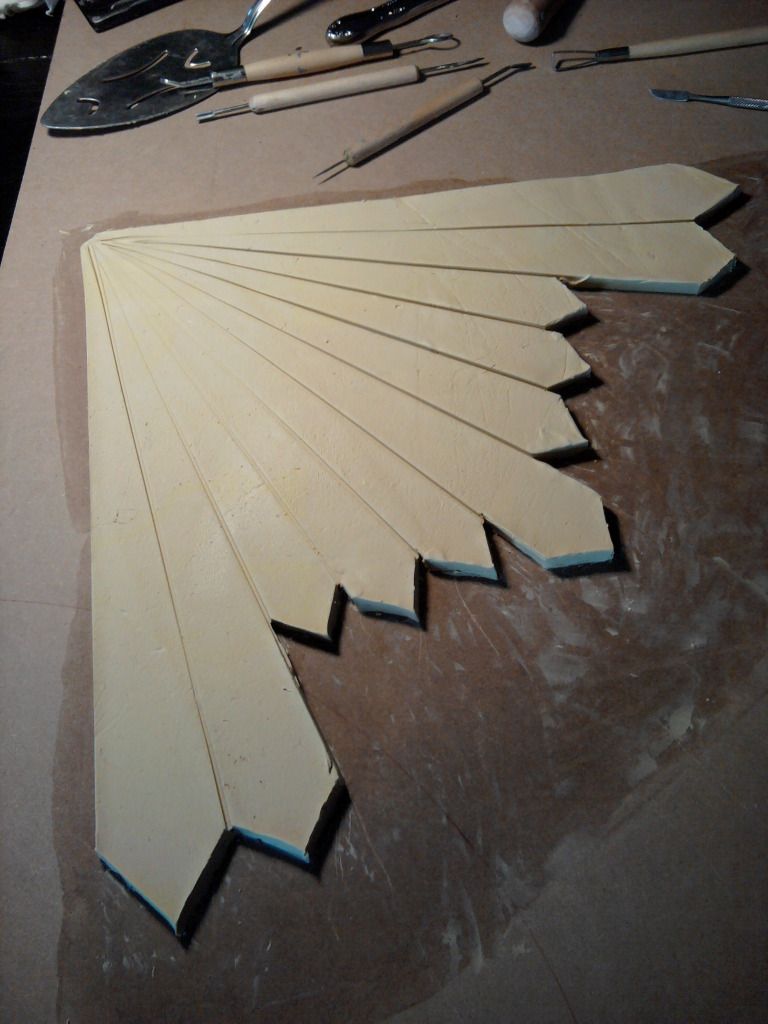
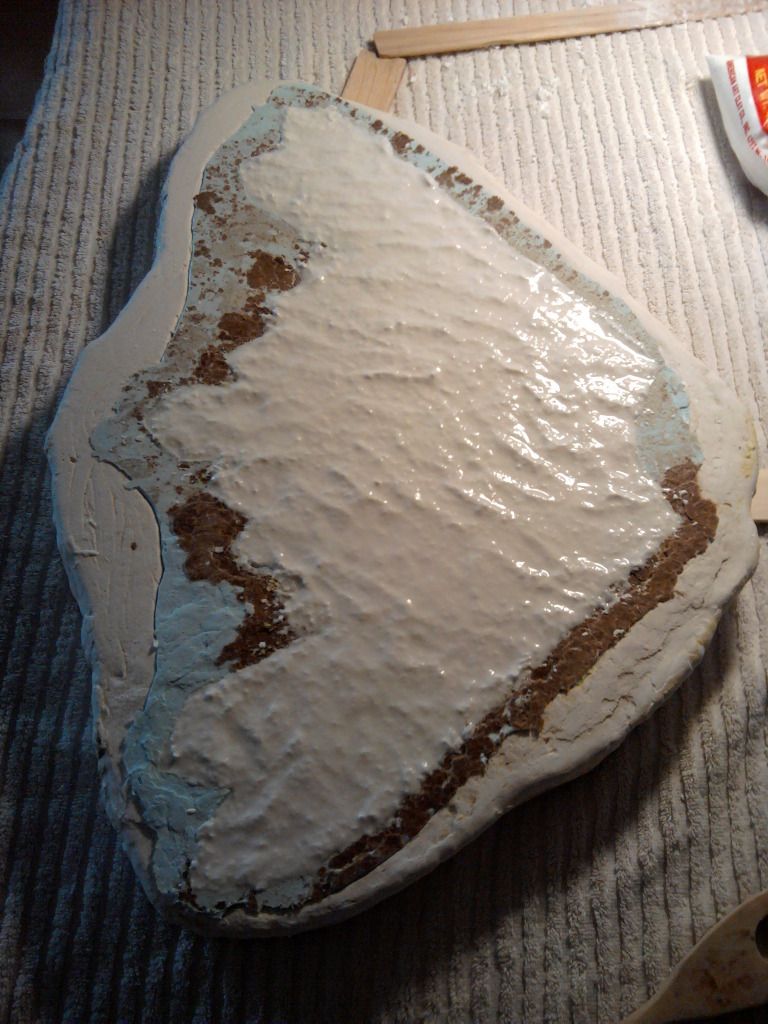
After the silicone is set, about 12 hours in this case, I used plaster
to make a mother mold to hold the silicone mold in the correct shape.
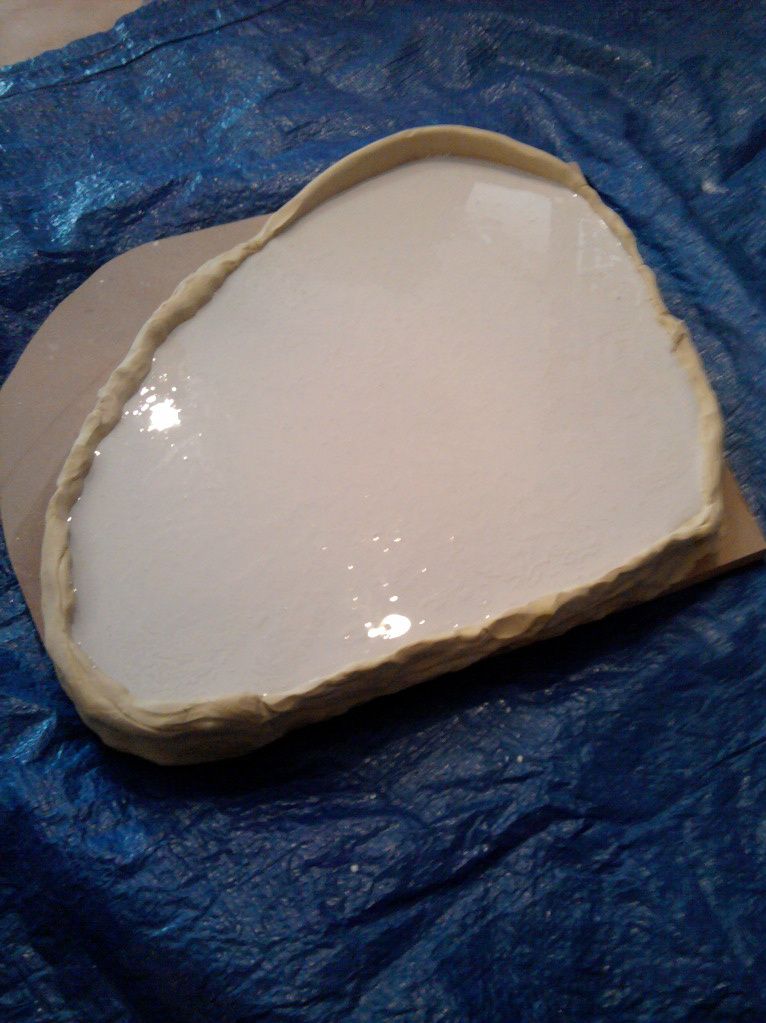
Be sure to use a release agent on the silicone or you'll have a heck
of a time separating the silicone and plaster.
Here's the mold in it's mother mold ready for casting.
I used a liquid casting plastic because I'm familiar with it and I had
some sitting around. It's a two part resin that can be demolded in 20
minutes, another plus. It goes in clear and turns white after it
cures.
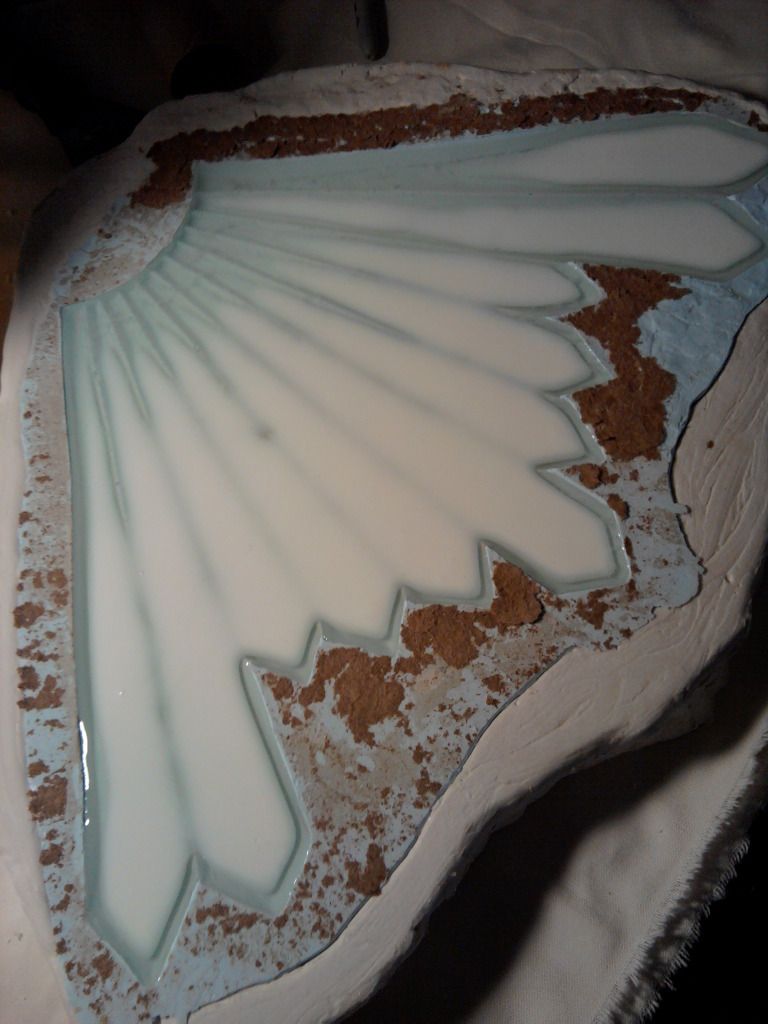
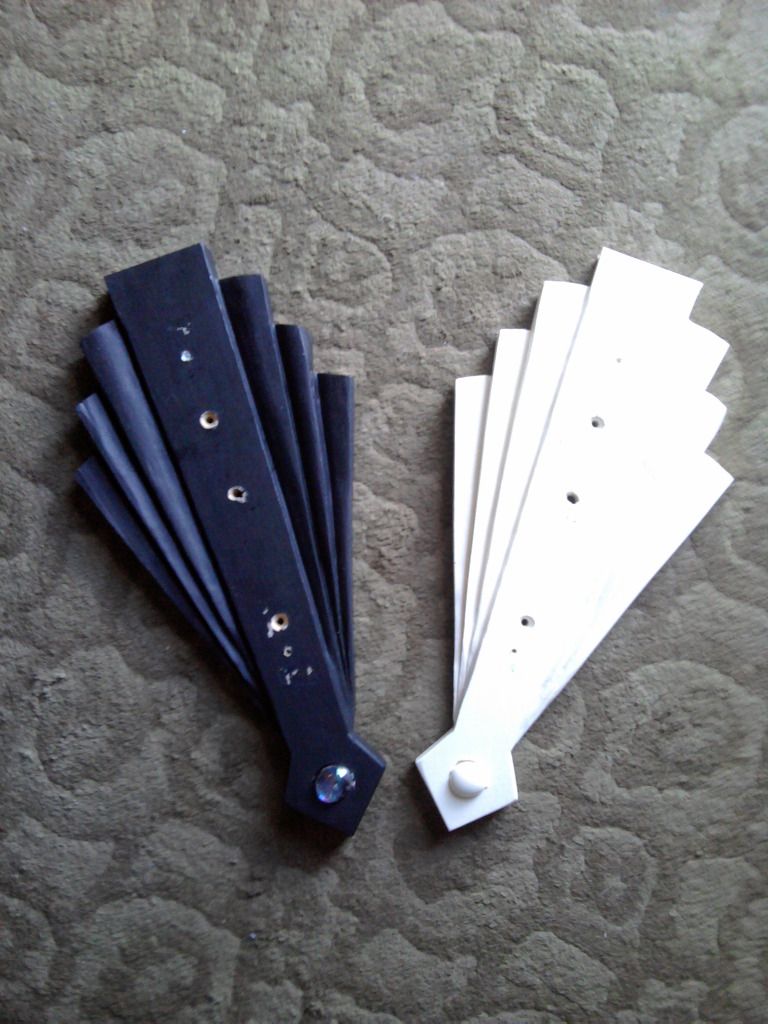
The finished cast. Now I just needed to make 39 more.
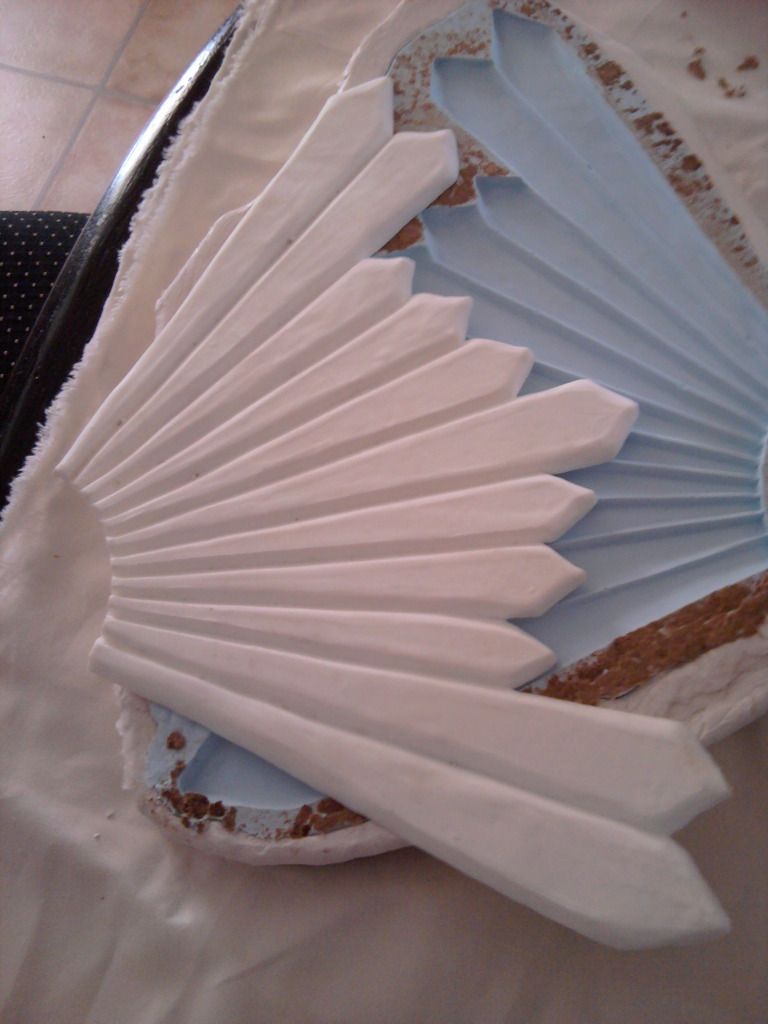
Next I used gorilla glue to glue the accents in place on the tiles.
Some of you that know my small theater may notice that I've changed my
color scheme. I was inspired by YW84U's Tanner Ridge Cinema.
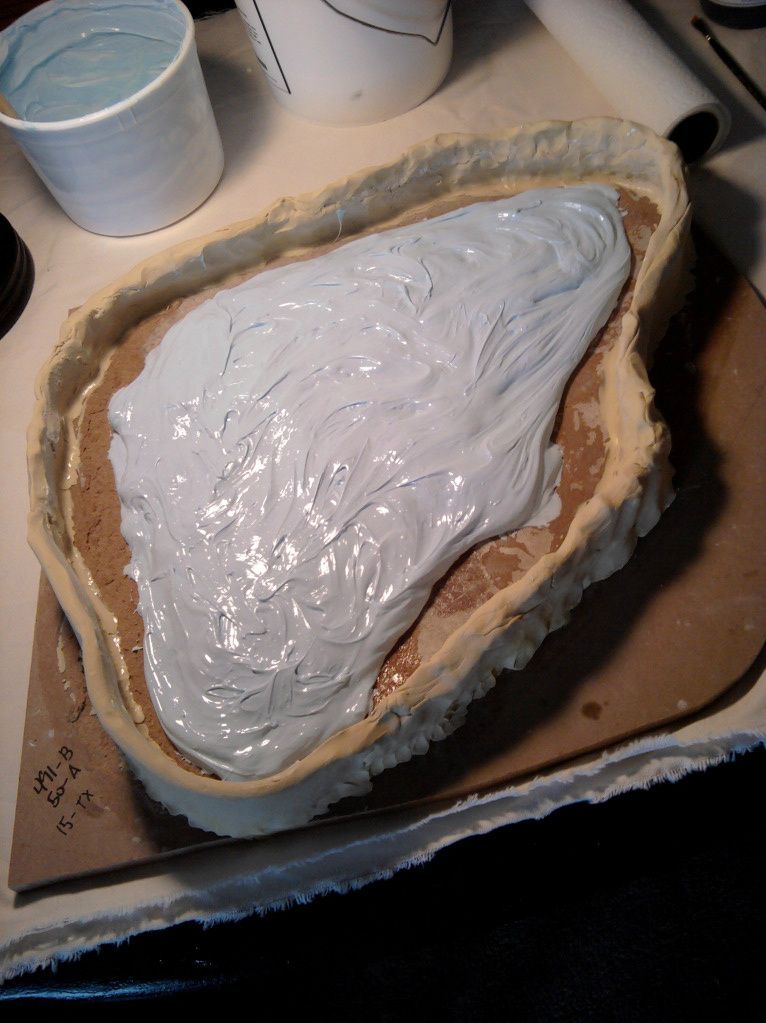
And the painted tile
The plastic accents made the tiles quite a bit heavier. I thought
about using a two part expanding foam but have had little experience
with it. I did try spray foam with disastrous results.
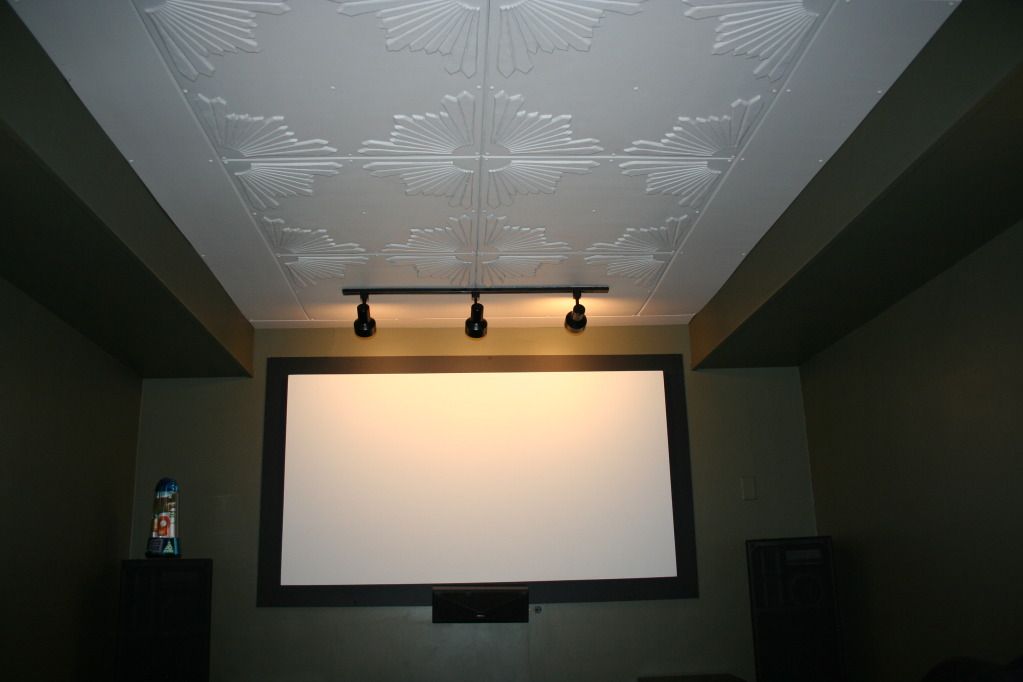
I'm very pleased with the look of the ceiling so far. I have four more
tiles with accents to make and many without the accents to hang. but,
between school and making art, I'm slowly getting there.
-Mac
comments
***Great job on the ceiling. The art deco accents
really add to the look.
If you are having trouble with matte finish paint try the Benjamin
Moore Aura line in Matte finish. It is scrubbable and doesn't show
marks like others I have seen.
***Thanks dcg58, That original mocha color was Dutch
Boy. Really not good at all. When I repainted I used eggshell on the
walls but used Behr paint and primer in one. Much much better. And I
used Behr flat on the ceiling and that's been much better as well.
I'm really enjoying the new color scheme.
Now, if I could only stay awake through an entire movie! Lol.
***aw man I kinda liked the industrial-ness of the
exposed ductwork and joists. Oh well, it's coming along.
***Saw the note in your OP with your theory of the 4805 light tubes
failing because people just turned them straight off. I actually have
been doing that myself for several years with my 4805, probably
because we both read the same thing in the 4805 owner's thread. Well
now mine is 6 years old (still on original bulb!) and the light tube
is sure enough failing. Oh well, got a new Panny AR100U 1080p arriving
tomorrow, so the 4805 will be retired, might try to get a few bucks
for it.
***The industrial look has it's place, but not in my theater  And those supply ducts were an acoustical nightmare.
It seems I may have been wrong about the light tube getting heat
soaked, if you went for six years without a problem.
I bought my 4805 about five years ago myself, I think for around $200
with the light tube in pieces. It's not a difficult fix but does take
an afternoon. I was looking at upgrading recently and was watching
eBay prices. Of course a 4805 with a new-ish bulb goes for much more
than a spent one, which went for something like $125-$150 is memory
serves. And with a new bulb, more around $300.
I decided to spend the $100 on a new bulb and save the other four or
five hundred (I wanted to spend on an HD) for risers, a stage, and
carpeting.
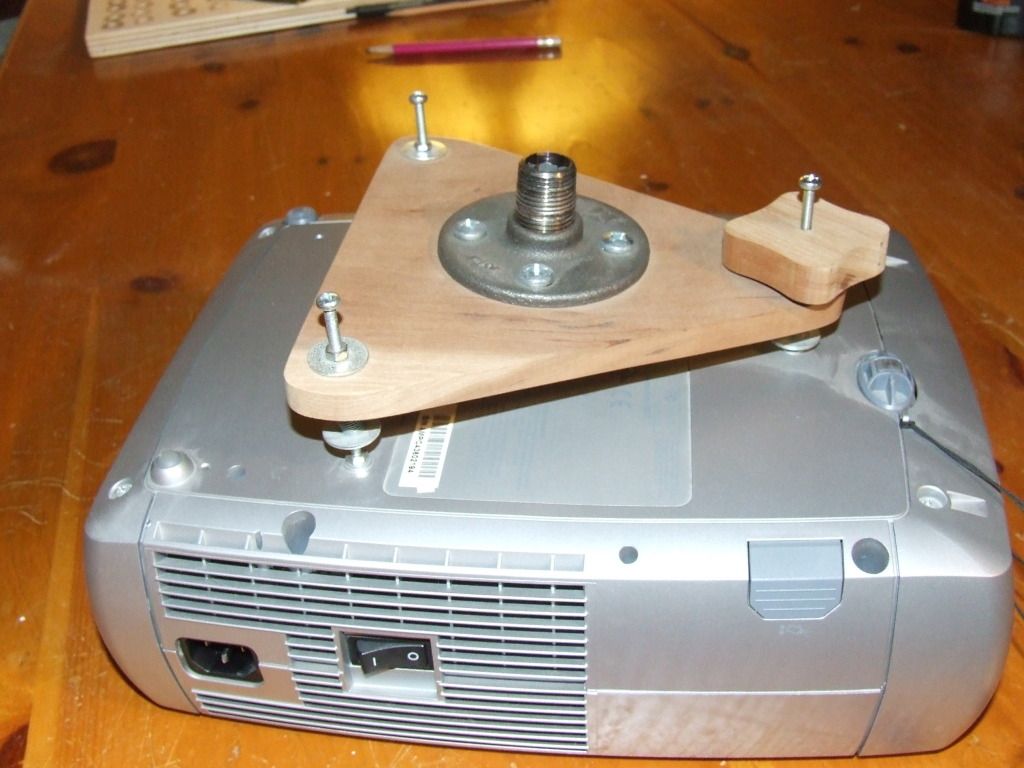
I don't think I ever posted my hand built projector
mount. It's made of Cherry since that's what I had laying around. The
knob on the front is to raise and lower the picture on the screen. And
there is an accompanying flange that attaches to the ceiling.
I've been testing something called Sculptamold, a powdered cellulose
one can purchase from art suppliers. It's lighter and a whole lot
cheaper than the plastic resin but has some major drawbacks. First of
all, it takes days (or longer) to harden and needs to be constantly
flipped in order to dry. And it's very brittle both wet AND dry. I've
made three now and broken every one. But I'm going to keep at it
because of the money savings.
Here it is after pressing into the silicone mold. It takes a while to
get it even.
And this is the demolded piece. I put a board (with wax paper) over it
while it's still in the mold, pick the whole thing up, and carefully
flip it over. Then carefully remove the plaster mother mold and the
silicone.
If I'm successful with the Sculptamold, I'll post pics highlighting
which accents are plastic and which are cellulose.
I have a big push coming in school until summer so it may be a while
before I get the ceiling finished.
-Mac
I thought I'd show you folks how I managed to
reproduce the hand-carved speaker bracket I had made early in the
build. Using the same silicone mold and plastic resin process, I cast
the original and now have an exact match. The picture is washed out
but it illustrates the idea.
Just need to make the steel speaker holder, paint and hang it.
more comments
Quote:
Originally Posted by petew 
OK I'm impressed. That is cool!
All I'd suggest is a darker color.
Quote:
Originally Posted by cybrsage
VERY nice!!! WOW!
Quote:
Originally Posted by White fish
nice, glade to see someone trying something different on thier
ceilng
I want to do something similar with fabric
Quote:
Originally Posted by JasonMiller1975
Beauty! Great hand-on job. +1 on the darker color.
Quote:
Originally Posted by macadoo
Thanks guys. It is a labor-o-love.
Two reasons for the ceiling color:
1. I've had a dark dark theater for years and it just seems to
render the room useless for anything but watching movies, etc. The
lighter color illuminates the room better for non-theater type
activities. And it doesn't seems to interfere with the picture at
all. I should note here that the color is actually just above a
medium grey. Not near as white as the picture looks. I flooded it
with light and used the flash to get a good picture.
2. If it was a darker color, nobody could see how freaking cool it
is! Lol. Which brings me to the only real drawback; I find myself
looking at the ceiling more than the screen, lol.
Quote:
Originally Posted by dRwOOD73
Very nice work - elegant look to an otherwise bland tile ceiling.
Quote:
Originally Posted by tony123
After more than a decade on the forum, I'm still amazed everyday
at the talent of motivated individuals. Great work!
Quote:
Originally Posted by NickTheGreat
FANTASTIC 
I'm a pretty handy fellow, but I sure couldn't do that. Well done!
Quote:
Originally Posted by mtbdudex
+1, I subscribe to this thread for the DIY know how shown here,
just in case I want it for some future reason.
Great job macadoo
Quote:
Originally Posted by dwightp
I would like to know where you get your supplies.
I think this is really interesting. You certainly got a terrific
themed look!
Quote:
Originally Posted by macadoo
A couple of things; White Fish, fabric? Sounds very cool. I'd like
to see what you come up with.
And NickTheGreat (and all), everyone seems to think that art is
some magical thing ,well...okay it kind of is, but nothing the
average person can't try. I'm actually new to clay. I work
mostly in wood and metals. The purpose of this write-up was to
show how easy (not cheap) it can be. One of the pictures shows a
bunch of fancy clay forming tools. The truth is, I did 95 % of the
work with kitchen utensils and my fingers. No fancy tools
required. Heck, you could probably use home made salt-dough for
the clay and off the shelf 100% silicone for the mold (although
the fumes would be dense, and I speak from experience).
I'm actually playing with something called
"sculpt-a-mold" which is basically powdered cellulose
(like paper-mache). It would be chepaer than the resin and a lot
lighter. BUT (and this is one big but) it takes at least 24 hours
to cure.
Thanks everyone for the kind words. I did this over my spring
break. Talk about not wanting to go back to work. And I love my
job! Lol.
-Mac
       
|